If you are visiting this page for the first time then you must visit part 1 of the tutorial
on how to upload a file on server here
Contents of this 5 part tutorial
Part 1 : Basics of ASP.Net file uploading, uploading a file to a server.
Part 2 : ASP.Net file uploading using EmptyFile Validations.
Part 3 : ASP.Net file uploading using FileSize validation.
Part 4 : ASP.Net file uploading using FileExtension validator.
Part 5 : Complete ASP.Net file uploading using all the Validations one at a time.
*File Upload in asp.net : v1.1 (Empty File Validation)*
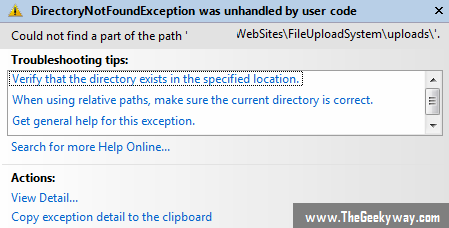
The first validation used is the empty file validation, what if the user doesn't upload a file and simply pres the upload button, here is the output if the user presses only the upload button. Then an exception error will be generated on the server side.
Now since in tutorial 1 we discussed on how to upload file to server without any validations now we are using our first validation Empty File Validation it checks whether the user has selected the file or not in file control panel or if the user has directly clicked the upload button without selecting the file. If the user has directly clicked the upload button then an exception System.IO.DirectoryNotFoundException will be generated.
Here is the image below showing the details of the exception.
2 ways of handling this exception
1. Using try-catch mechanism
Now since DirectoryNotFound Expression is thrown by the server then it can be caught by the try-catch mechanism.
The C# code for method 1 (try-catch) is :-
private void isFileEmpty()
    {
        Panel1.Visible = true;
        try
        {
            Image1.ImageUrl = "~//images//success.png";
            File_Upload_Status.Text = "Everything OK! File Uploaded";
            File_Upload_Status.ForeColor = Color.Green;
           //Provide the C# code for uploading the file which was discussed in part 1 of this tutorial
        }
        catch (DirectoryNotFoundException dnfe)
        {

            string _substring = dnfe.ToString();
            Image1.ImageUrl = "~//images//not_success.png";
            File_Upload_Status.Text = _substring.Substring(0, 72) + ". Please upload a valid file.";
            File_Upload_Status.ForeColor = Color.Red;
        }
The output of the above code will be following images
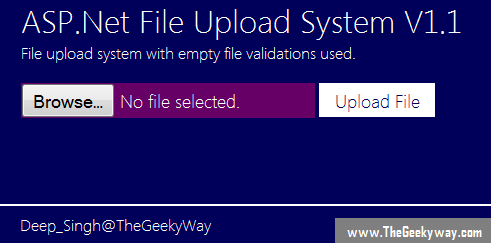
Image 1 : The interface for the upload mechanism
Image 2 : Clicking the upload button when no file is selected.
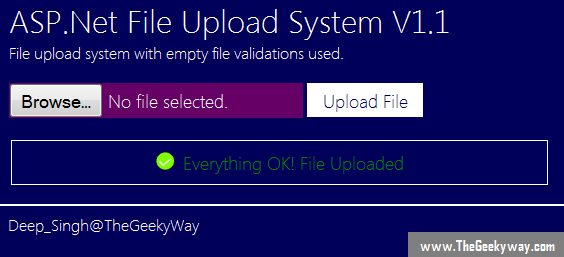
Image 3 : Clicking the upload button when a file is selected and uploaded.
2. Using Boolean property "HasFile"
Another way of handling this exception is by using the Boolean property "HasFile" which will return the value as true or false. If the value returned is false then you can return the error message else it can continue with the uploading of file.
The C# code for method 2 (Boolean method) is :-
private void isFileEmpty()
    {
        Panel1.Visible = true;
        if(FileUpload1.HasFile)
        {
            Image1.ImageUrl = "~//images//success.png";
            File_Upload_Status.Text = "Everything OK! File Uploaded";
            File_Upload_Status.ForeColor = Color.Green;
            //Provide the C# code for uploading the file which was discussed in part 1 of this tutorial
        }
        else
        {
            Image1.ImageUrl = "~//images//not_success.png";
            File_Upload_Status.Text ="Please upload a valid file.";
            File_Upload_Status.ForeColor = Color.Red;
        }
    }

Thats all for the empty file validations property. In the next part of our tutorial we'll discuss about the SizeValidation( Limiting the size of upload on the server).
Posted By: Sanyam Khurana

The Geeky Way is founded by Sanyam Khurana. He graduated from Georgia Tech, Atlanta, US with a Master's degree in Computer Science. He goes by 'CuriousLearner' all over the web & has spoken at many international conferences. He likes to contribute to FOSS. He is listed as an individual contributor of the Django project, bug-triager for CPython & has his name listed in the credits section of every browser ever released by Mozilla. In his free time, he likes to improve his guitar skills or binge-watch series.. You can find him on Twitter