Welcome back geeks, this tutorial is a continuation of previous tutorial. So please read the previous one if you have not read it.
So we had created a simple layout and it looked something like this :
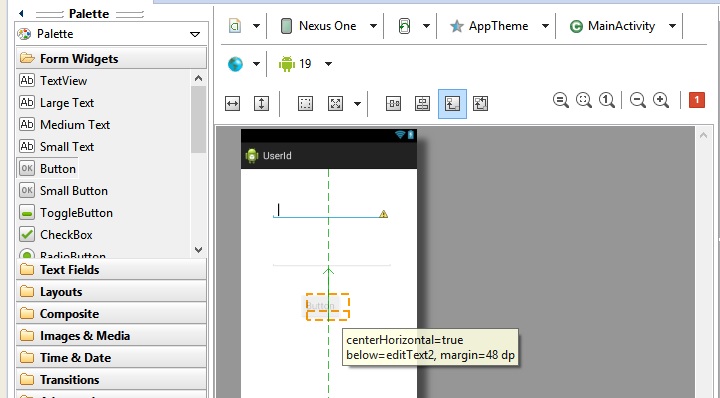
Double click on the button to change the text of the button, now the window will switch to XML version of the layout. In the XML file, the part of button definition is highlighted.
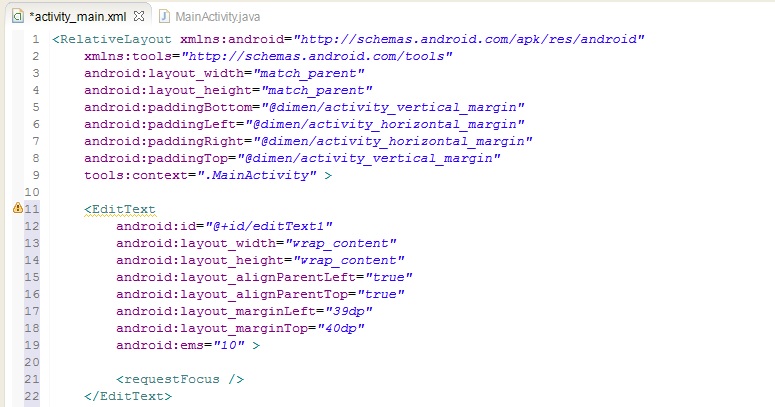
Move to the top of XML file and we’ll understand each thing written in the file. The first two lines are just references to website.
 1. The default layout being used by eclipse here is Relative Layout. As obvious from the name, in Relative Layout each component is aligned with respect to its previous component(s) which was added to layout.
2. android:layout_width=”match_parent”. This code sets the width of Relative Layout to cover the complete width of layout. Similarly the next line sets the width to complete width of the layout.
3. The next four lines of code just provide some padding to all the sides using constant value defined in dimension ( \@dimen ).
The next code fragment adds an EditText (or textfield) to the layout whose attributes are :
a) android:id=”\@id/editText1”: This id is used to refer this textfield in java program, as well as to align other components using this EditText.
b) android:layout_width=”wrap_content” : The width of component just wraps the content, or simply just sufficient to store a simple line of text. Similar is for height of EditText.
c) android:layout_alignParentLeft="true" : The component is aligned from left of its parent. This value is set to true to apply these changes. Similar is for next line. So by these two lines, the EditText is aligned to Top-Left of Parent (or the layout/screen).
d) android:layout_marginLeft="39dp" : A slight margin is given towards left side. dp is density pixels. It is better to specify spacing using dp rather than px (pixels) because px is not same for different android phones, whereas dp is same for different android phones. Similar is done by next line to set top margin.
e) android:ems=”10” : Simply means that the EditText (text field) can contain 10 characters. To Experiment with ems, try changing its value and see corresponding change in the Graphical Layout.
We can specify many more attributes for a text field. Use Ctrl+Space in Eclipse to view more related properties. For eg. write this in eclipse and press Ctrl+Space to view more attributes.
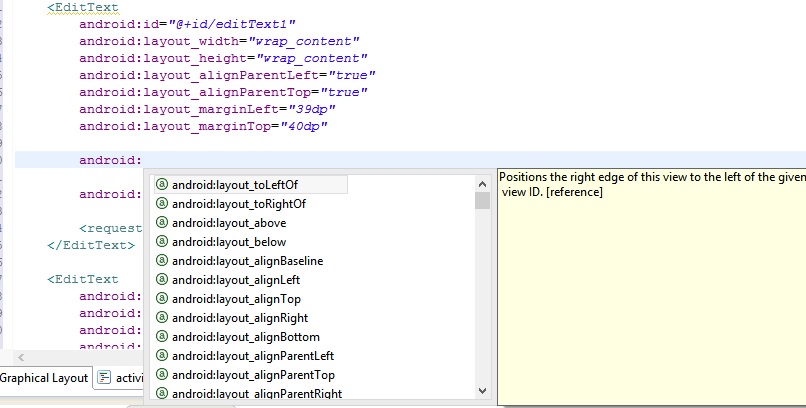
When you write android: on a blank line and press Ctrl+Space to view all these attributes. Similarly we can also use this shortcut to view suggestions in Java program also.
In the second EditText, everything is same except inputType attribute which is set to “textPassword”. This sets the input mode to password, so the text input by user is set to bullets (to hide text).
To experiment, you can use Ctrl+Space shortcut to see more available inputTypes (shown below).

For button, all the attributes are self-explanatory and similar to those explained previously except the android:text attribute. This attribute sets the Text which is displayed on the button and is visible to the user. If you notice carefully, you’ll see an exclamatory mark on the left corner of line where text for button is specified.

When you bring mouse pointer close to the mark, you see the notice the warning “Hardcoded string ”Button”, should use \@string resource”. For now just ignore this warning, it would be discussed later where you will specify the String using strings.xml file.Now our XML work is complete and we’ll move to the MainActivity.java file to start the coding part.
Out Java file contains this much code for now :
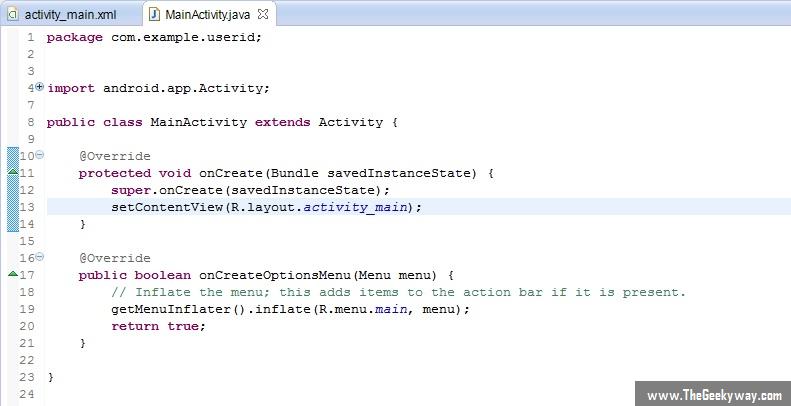
People familiar with java will understand the first two statements (package and import). Next is our class which extends the Activity class. In android, each new screen is an Activity, so it extends the Activity class which is present in android.app package. Click on ‘+’ sign on the left import to see other imported packages.
The first method inside our class is onCreate method. This is a part of Android life cycle. Java programmers must be knowing Applet Life Cycle methods. Similarly, an android application also has a life cycle (which would be discussed in further tutorials). For now, just consider that onCreate is just an initialization method for our activity. In the first line of code, it simply calls the super class method. The second line sets the layout of our activity to R.layout.activity_main. This is nothing but a reference to the XML file just created by us and stored in layout folder. It is accessed by its defined in R.java file (auto-generated java file). The second method creates a menu which is rather not required here, so either let it be there or remove it. We’ll discuss about that method later. Paste this codeto your application and in the next tutorial we’ll understand the java code and finish this second simple android application.
Posted By: Sanyam Khurana

The Geeky Way is founded by Sanyam Khurana. He graduated from Georgia Tech, Atlanta, US with a Master's degree in Computer Science. He goes by 'CuriousLearner' all over the web & has spoken at many international conferences. He likes to contribute to FOSS. He is listed as an individual contributor of the Django project, bug-triager for CPython & has his name listed in the credits section of every browser ever released by Mozilla. In his free time, he likes to improve his guitar skills or binge-watch series.. You can find him on Twitter