Hello Geeks, hope you have read the previous article and are clear with the theoretical concepts of an Android Activity and its Lifecycle. Now we will create a code for the same to see what all methods are called in which cases. This code is similar to what you might have created to study lifecycle of an Applet in Java (for those who are from java background). Create a new Android Application in Eclipse IDE and paste this code.

As you can see in the code, that we have extended the Activity class and overwritten all the methods which we had discussed in previous tutorial. In each method, we first call the super class version of the method (using super keyword) and then we write our own statement. Here we use a special class from android.util package. This is the Log class which is used for debugging in android. We use Log.d method in this program which has the following signature.
static void d ( String tag, String message )
First parameter takes the tag (you will shortly get to know what it is) and second takes the message to be printed. Anything printed using Log.d method is shown on the LogCat. LogCat is generally visible at the bottom as shown below:
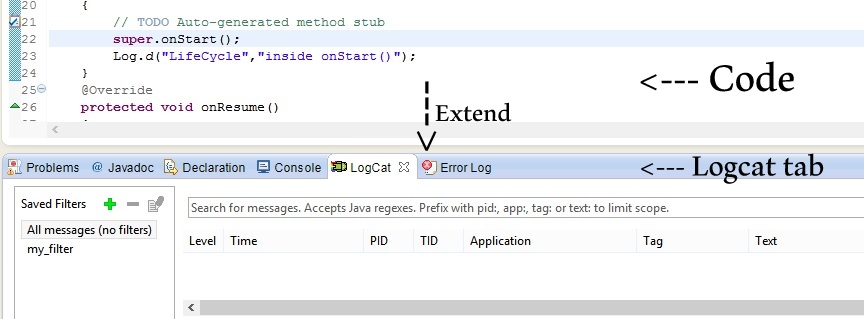
The above screenshot shows the LogCat under the text area where we code. We can use the position marked as “Extend” in above screenshot to extend the logcat upwards so that it more messages are visible without scrolling.
Moreover, we also have a Debug perspective in which tabs like Console, Logcat, Variables and program breakpoints as shown here :

The default perspective is Java (extreme left). In the above screenshot, the Tag is nothing but the string visible inside “Tag” column (Lifecycle here) and Message is the string visible inside “Text” column (inside onCreate(), inside onStart() etc).
For those who are from pure java background, we can also use System.out.println() for debugging, and it will be visible in Console tab, but it is not recommended by Android Developers. Moreover, it may or may not work for some versions.
When we execute a typical android application in android virtual device, we get many messages from the system (or the virtual device). So sometimes it may become hard to locate our own messages in the LogCat. To overcome this problem, we can create custom LogCat filters so that our custom LogCat reads only specific tags or messages.
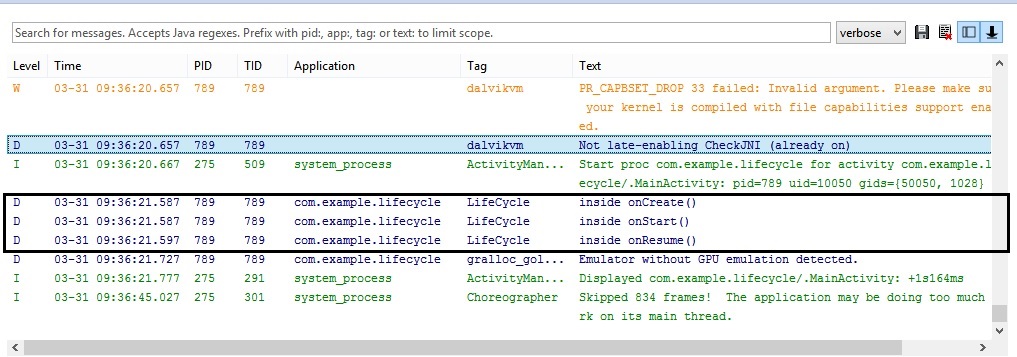
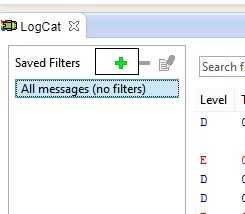
In the above screenshot, we need to focus only on the tags marked above, but the LogCat shows all the tags which are coming from AVD. So we can create custom LogCat filter by clicking on this icon present on left side of LogCat filter.
Then this dialog box appears
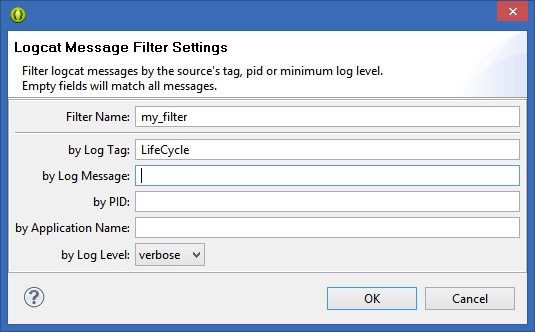
I have all tags with name “LifeCycle”, so I have named the tag “LifeCycle”. The message doesn’t matter so I keep it blank. Click OK to create the filter.Now we are clear with basics of debugging and will execute our application with our virtual device and notice the output in LogCat when the Lifecycle methods are called.Execute the application and select your custom filter.
As per the previous tutorial, when the application starts, the methods shown below are called:

When we come back to home screen (using Home button on emulator), the GUI is updated and our activity is no more visible so these methods are called:
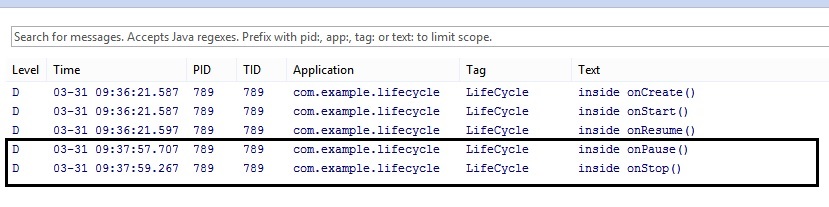
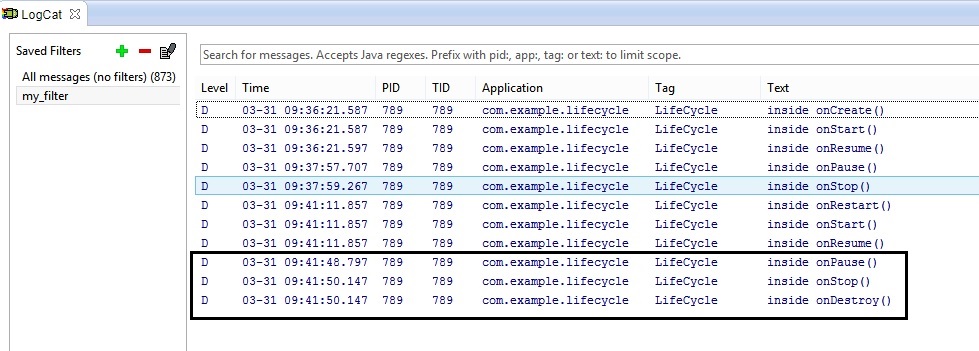
The application still remains in memory, so onDestroy() is not called yet ! Now we come back to our application using Menu and these methods are called in quick succession :

Now we use BACK button to exit the application and these methods are called :
So this completes the 7 basic methods in Android Lifecycle. Comment if you have any doubt !
Posted By: Sanyam Khurana

The Geeky Way is founded by Sanyam Khurana. He graduated from Georgia Tech, Atlanta, US with a Master's degree in Computer Science. He goes by 'CuriousLearner' all over the web & has spoken at many international conferences. He likes to contribute to FOSS. He is listed as an individual contributor of the Django project, bug-triager for CPython & has his name listed in the credits section of every browser ever released by Mozilla. In his free time, he likes to improve his guitar skills or binge-watch series.. You can find him on Twitter